Intro and Setup
In malware analysis, having an environment ready-to-go with prebuilt tools saves us a lot of time. For my setup, the tools I’ll be using are:
- REMnux
- FlareVM
Intro
REMnux
It’s a toolkit for reverse engineering and analyzing malicious software. We analysts can utilize it to investigate malware. Those who want to get started without wasting time to configure and setup different tools, it is a go-to.
There are a few different ways to get started with REMnux.
- Using their VM
- Install REMnux on our own OS
- Install in a container using docker
FlareVM
A collection of software installation scripts for Windows. The scripts automatically installs and configures the Windows environment for us with tools that include disassemblers, debuggers, memory analysis tools, and various others for analyzing and dissecting malware samples.
When the scripts are successfully executed, the Windows VM is prepped and ready for malware analysis and reverse engineering tasks.
Setup
I will have FlareVM and REMnux up and running at the same time. I’ll use FlareVM to do Dynamic Malware Analysis, and REMnux for Burp Suite Proxy. By using Burp Suite, I can intercept traffic, and decrypt it, to reveal additional information that the malware generates.
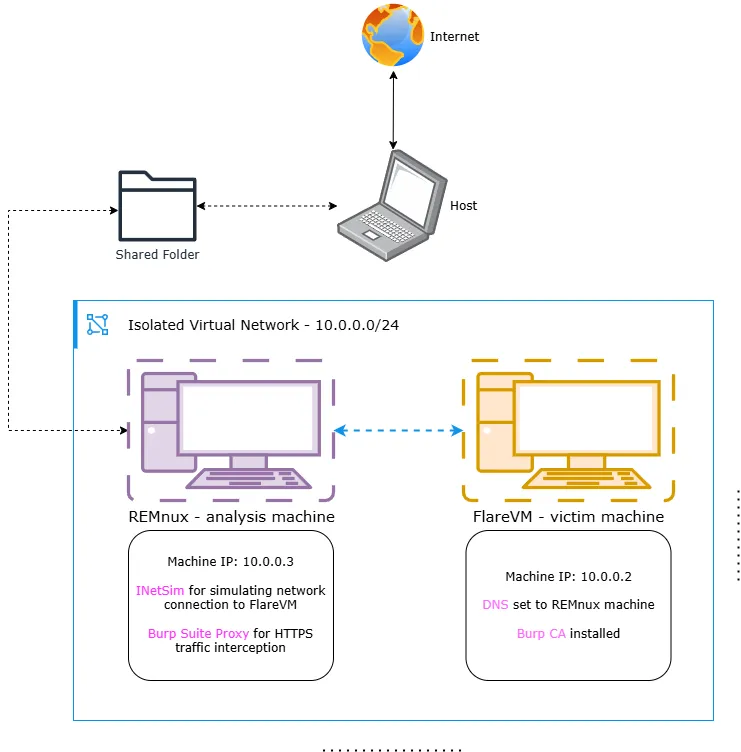
I am now going to get started with setting up the environment on VMware Workstation Pro 17. I’ll be needing two VMs, one with an Windows OS for FlareVM and another VM for REMnux.
Create Windows VM
I am setting up a new Windows 11 ISO image on my VMware Workstation. A few important notes:
- I don’t want my machine to have any kind of microsoft account integration or to pull or push from any outside sources. For that reason, there should not be any internet connection to the VM during the OS setup.
- To bypass the forced internet requirement dialog box - Open cmd by pressing Shift + F10 and then run OOBE\BYPASSNRO. This should restart the OS and enable the “I don’t have internet” option.
- After the setup is done, Windows Defender can be removed using Windows Defender Remover
The machine username should not contain spaces or special characters. Taking a VM snapshot of current VM state before moving forward.
Run the flarevm install script
Next, let’s open up PowerShell with admin privileges and download the FlareVM script.
(New-Object net.webclient).DownloadFile('https://raw.githubusercontent.com/mandiant/flare-vm/main/install.ps1',"$([Environment]::GetFolderPath("Desktop"))\install.ps1")Navigate to Desktop and Unblock the file:
Unblock-file .\install.ps1Set Execution policy to unrestricted:
Set-ExecutionPolicy Unrestricted -ForceOnce done, let’s run the script.
.\install.ps1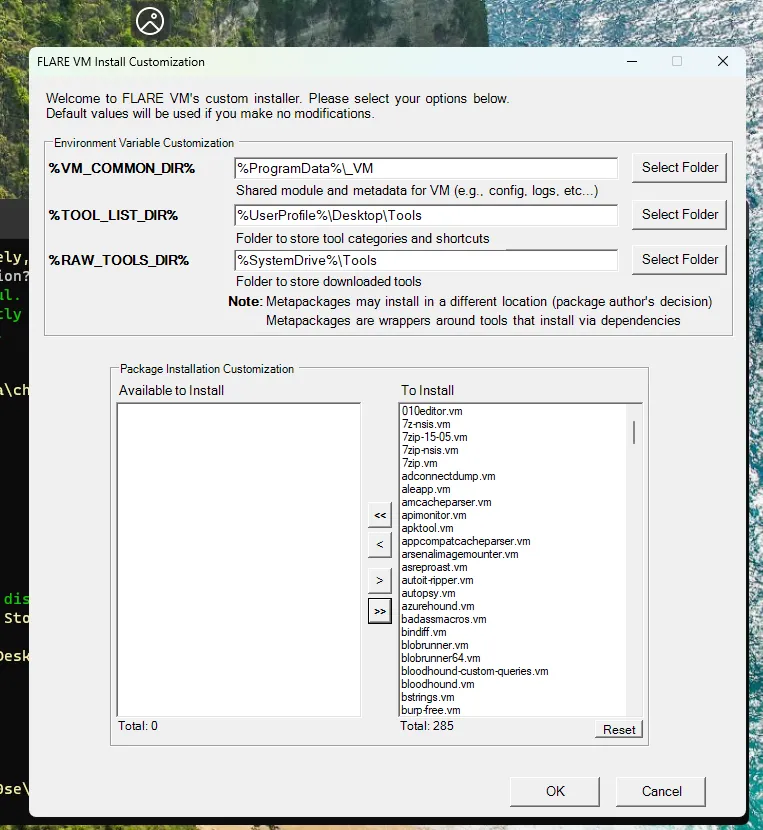
On the installation GUI, I am selecting to install all the available packages. It is going to take a lot of time to download and install all of the 285 packages and the VM is going to restart a few times. After the script has finished running, I can see my new desktop screen.
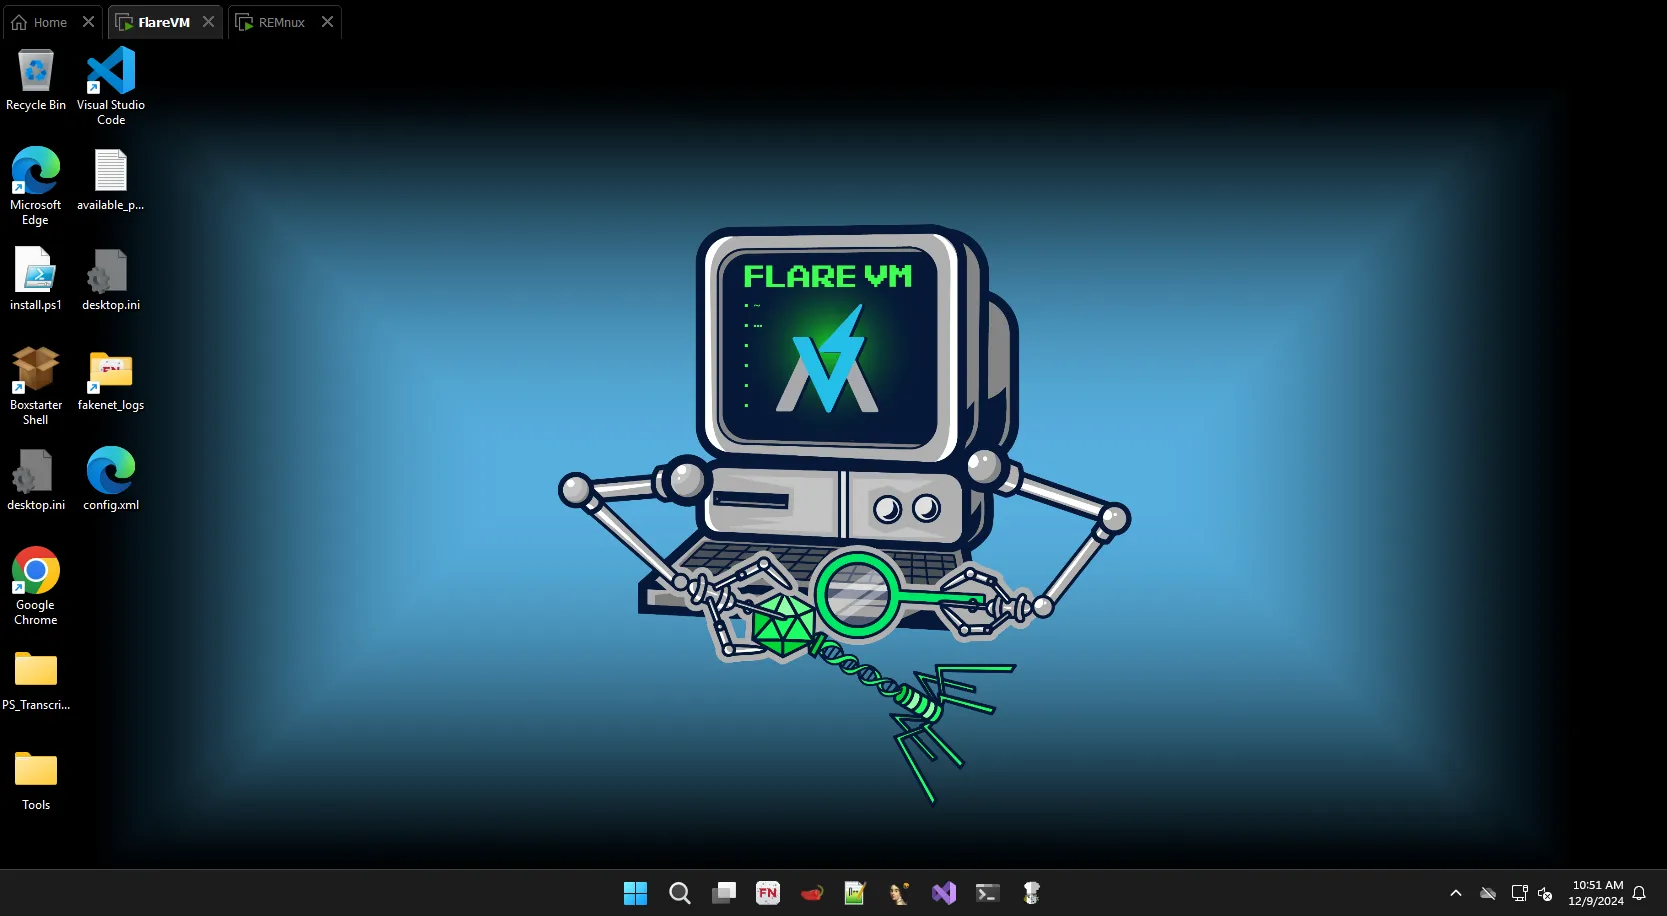
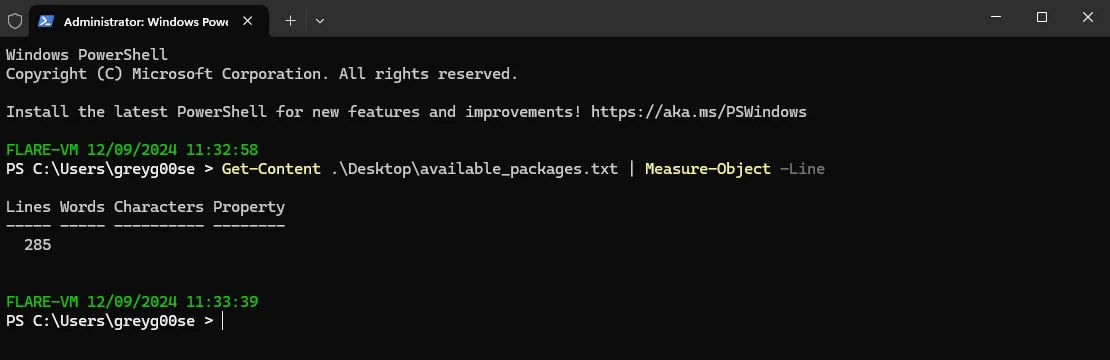
There is an available_packages text file on Desktop which can be checked to verify how many packages are installed.
Taking a snapshot of this state so that if the system breaks for some reason in future, I can restore this state of my machine.
The hostname of the Windows OS should seem like a normal person PC name as some malicious software may try to avoid running if it detects a generic sandbox environment hostnames. We should mimic a normal user’s system as much as possible to avoid anti-analysis techniques.
Install REMnux
Let’s get the REMnux OVA file. After downloaded, it’s always a necessary practice to check the filehash for a match.
Get-FileHash .\remnux-v7-focal.ovaAfter that, opening the OVA file with VMware. After the import is finished, I start the VM and then I am presented with the remnux terminal.
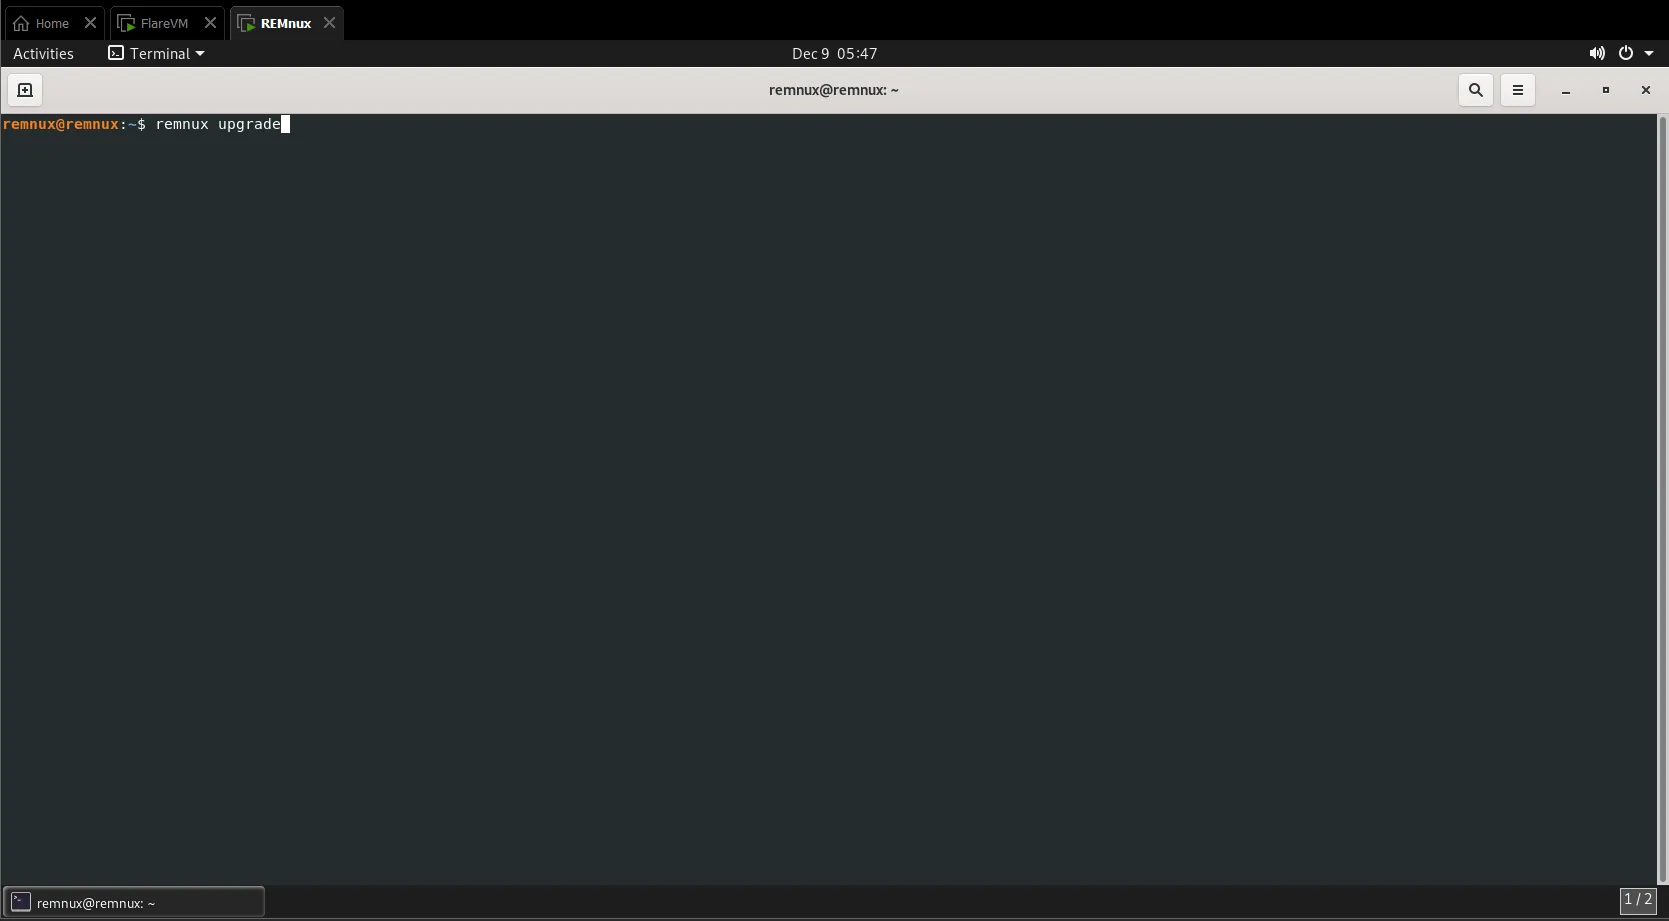
Running the following as a non-root user to update the packages.
remnux upgradeLet’s go ahead and take a snapshot of the updated VM state and save it as a baseline image.
If we need to get elevated privileges or want to connect remotely to the machine in future, the default credentials are:
Username: remnux
Password: malware
Configure isolated network
Now that both the VMs are operational, I need to create a Host-Only network adapter to fully isolate my lab from the host and the external network.
Create isolated network
- From VMware user interface > Virtual Network Editor > Run as administrator
- Add a network > Rename to something else (can mimic a name to bypass anti-analysis efforts. I am naming it “HR-internal”)
- Use Host-only network > Using subnet IP
10.0.0.0and netmask255.255.255.0(completely different from host/main network) - Configuring DHCP settings with starting IP as
10.0.0.2and ending IP as10.0.0.254 - Apply settings
Include the machines
- VM settings window > Network Adapter
- Select Custom: Specific virtual network > Select the newly created network
I have assigned both the VMs to the network adapter.
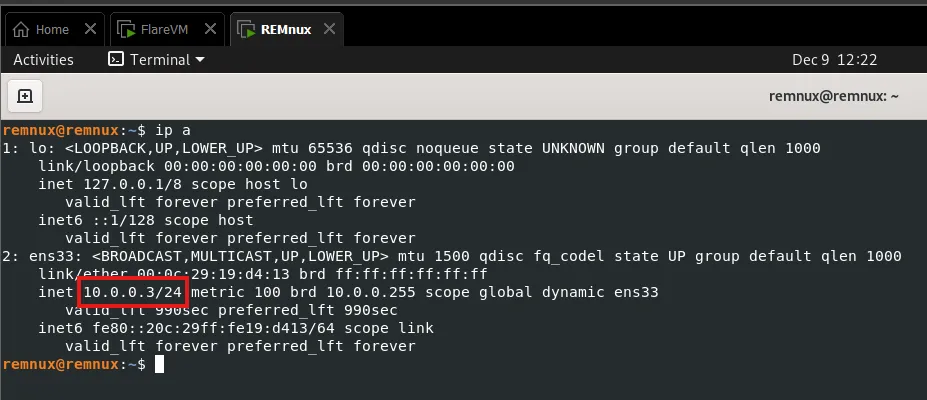
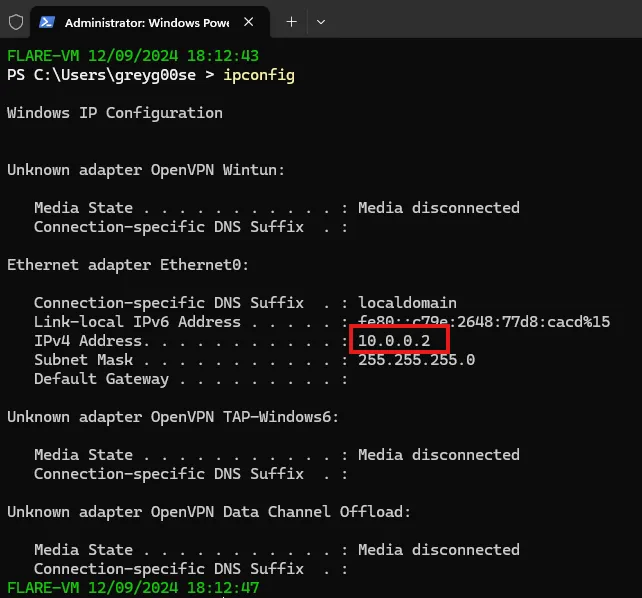
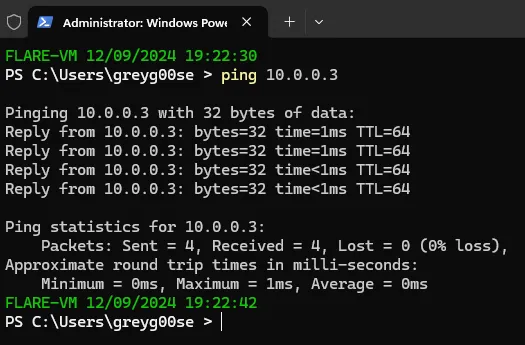
The network IPs assigned to the VMs are:
FlareVM IP 10.0.0.2
REMnux IP 10.0.0.3
Test connectivity
Let’s test the isolated network by pinging the two machines.
FlareVM to REMnux:
REMnux to FlareVM:
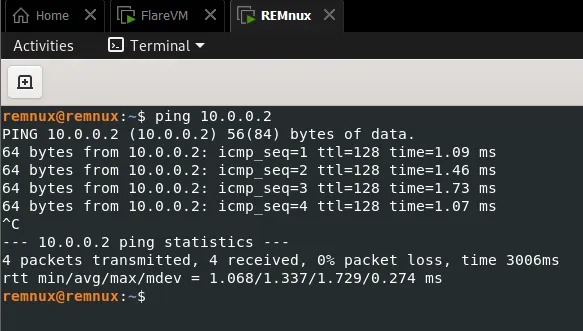
Nice! The two VMs can now talk to each other.
Set preferred DNS
From the Windows VM:
- Control Panel > Network & internet > Network and Sharing Center
- Change adapter settings > Right-click on the Ethernet > Properties
- Open Internet Protocol Version 4 (TCP/IP) Properties window
- Set preferred DNS server address to REMnux VM IP address
Setting the DNS server address to REMnux IP will allow me to simulate an internet connection using INetSim. This way, when a malware is run it will be tricked into thinking that the Windows VM has an internet connection, while in reality it is contained.