Elastic Agent & Fleet Server setup
Objectives:
- Install Elastic Agent on Windows Server
- Enroll the Windows Server into a Fleet for centralized management
Steps to create fleet server
- Go to Compute Engine > VM Instances > Create Instance.
- Name the instance (
fleet-server)- Choose Region: Pick the same region our VPC resides in (I choose ‘asia-east1’ and zone
asia-east1-a).- Machine configuration: Select a machine type which won’t incur much cost (e.g., e2-medium with 2 vCPU and 4GB RAM).
- OS and Storage: Choose Ubuntu 22.04 LTS as your operating system and enough storage (I choose 30 GB SSD persistent disk)
- Networking: I’m not adding any firewall rules from here. But we need to put here the network tag
fleet-serverwe created earlier for our firewall ruleallow-agent-logs. Under network interface let’s choose our VPCsoc-elkand select subnetvpc-internal. Let’s choose a custom IP address (I choose172.31.0.3. We cannot use172.31.0.1for our machines as it is already reserved for the gateway and172.31.0.2for ourelk-server). Let’s also Reserve an Static External IP and name itfleet-server-external-ip.- Leaving all the other options as is
- Click Create to create our fleet server instance
My fleet server instance config
| Configuration | Value |
|---|---|
| Instance Name | fleet-server |
| Region | asia-east1 |
| Zone | asia-east1-a |
| Machine Type | e2-medium (2 vCPUs, 4 GB RAM) |
| Operating System | Ubuntu 22.04 LTS |
| Storage | 30 GB SSD persistent disk |
| Network Interface | soc-elk |
| Subnet | vpc-internal |
| Custom IP Address | 172.31.0.3 |
| Static External IP | fleet-server-external-ip, reserved |
| Firewall Rules | As configured for the network. Use network tag fleet-server to enable allow-agent-logs |
| Network Tags | fleet-server |
Let’s access our elastic GUI running on our elk-server machine with http://<elk-server-external-ip>:5601 and Login if necessary.
From the hamburger menu > Under Management > Fleet > Click Add fleet server
We can go ahead with the Quick start settings for this project. But for a production environment use of Advanced settings is recommended.
Set up Fleet server
- Name the server
fleet-central(or anything else) - For the URL:
https://172.31.0.3:8220. Fleet servers use port 8220 by default to listen to agents. - Click Generate fleet server policy. After a few seconds we can see the policy created
- Copy the
Linux Tarcommand to install our fleet server on a centralized host
To be able to SSH into the fleet-server instance, we’ll need to add our public SSH key created before in our fleet-server VM instance. Now we should be able to SSH into the fleet instance.
After we are in the machine:
sudo -iapt-get update && apt-get upgrade -yInstall fleet server to a centralized host
After our machine is done updating, we can proceed with executing the Linux Tar Command we copied earlier.
curl -L -O https://artifacts.elastic.co/downloads/beats/elastic-agent/elastic-agent-8.15.1-linux-x86_64.tar.gz tar xzvf elastic-agent-8.15.1-linux-x86_64.tar.gz cd elastic-agent-8.15.1-linux-x86_64 sudo ./elastic-agent install \ --fleet-server-es=https://172.31.0.2:9200 \ --fleet-server-service-token=AAEAAWVsYXN0aWMvZmxlZXQtc2VydmVyL3Rva2VuLTE3MjcyNzM4NTQ3MzU6WlBZbEdJcWFRcGlnajhZblo0NjZrUQ \ --fleet-server-policy=fleet-server-policy \ --fleet-server-es-ca-trusted-fingerprint=51b0902d757674b3c5048f65deadfa1189dfa850101ed36946d6230d833a07b8 \ --fleet-server-port=8220After the Elastic Agent is done installing without any errors we see the output below.
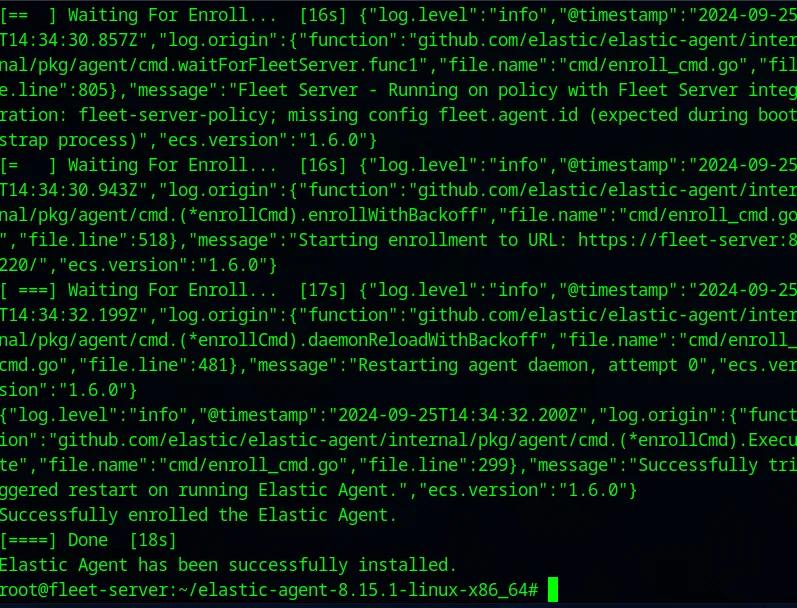
On our Elastic GUI we can see:

Enroll Windows server Elastic Agent in Fleet
Now that our fleet server is set up, we can now start enrolling agents onto our fleet. Let’s start by adding an agent on the existing Windows Server. Let’s create a policy and name it Agent-Windows-Server for our Windows Server instance. Make sure to check the Collect system logs and metrics checkbox and create policy. Let’s copy the Windows command to install our elastic agent on our Windows Host.
$ProgressPreference = 'SilentlyContinue' Invoke-WebRequest -Uri https://artifacts.elastic.co/downloads/beats/elastic-agent/elastic-agent-8.15.1-windows-x86_64.zip -OutFile elastic-agent-8.15.1-windows-x86_64.zip Expand-Archive .\elastic-agent-8.15.1-windows-x86_64.zip -DestinationPath . cd elastic-agent-8.15.1-windows-x86_64 .\elastic-agent.exe install --url=https://172.31.0.3:8220 --enrollment-token=UkppcktaSUJVbUJ3M1F3eEJ1SEQ6aGdEbzhoc1FRUVMxSlN1bUhQME5PZw==Let us begin by establishing an RDP connection with our windows-server machine. Once we are in, we need to run Powershell with administrator privileges. Let’s run the command we copied. At this point, we run into the following error:
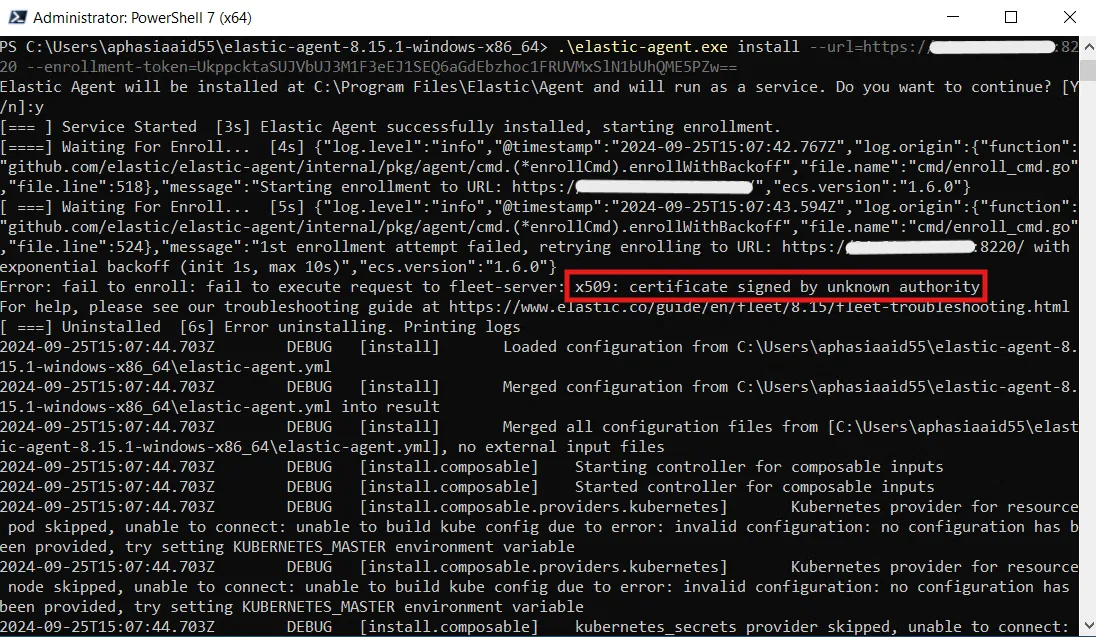
We can notice the origin of the error saying x509: certificate signed by unknown authority. This is expected because we did do a self-signed certificate. To bypass this error, we can include the --insecure flag at the end of the command and run it again.
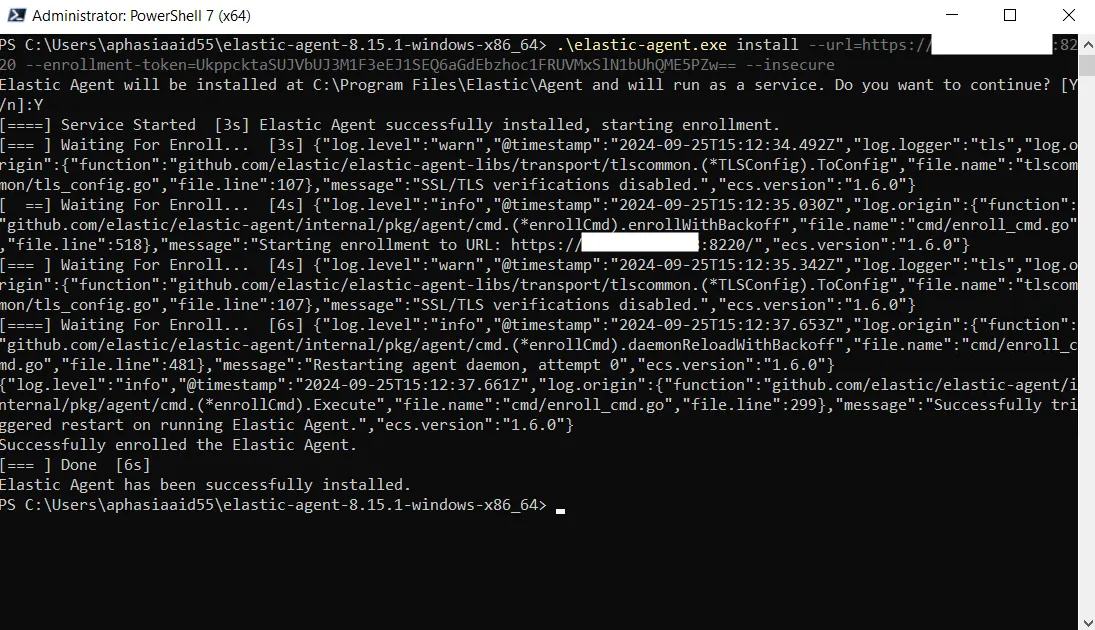
And voila! The Elastic Agent is now running on our Windows Server.
In a production environment, we are expected to use Advanced settings while creating the fleet server and we’d need to create our own certificate authority.
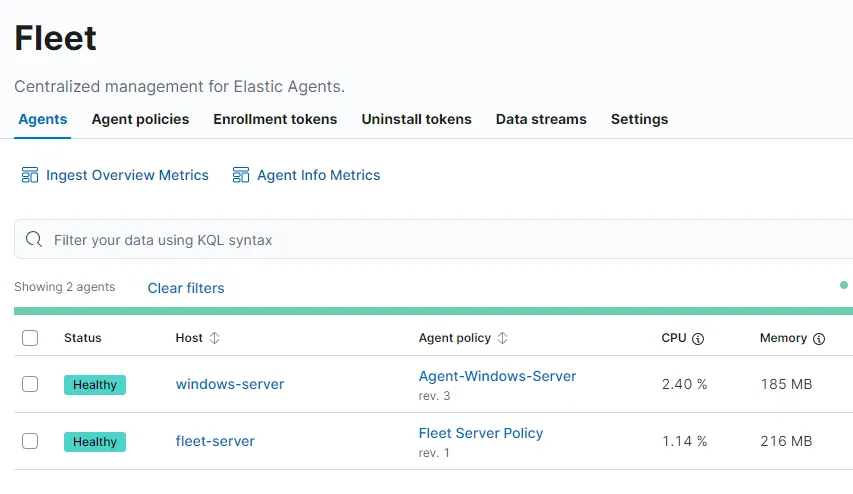
Here it is showing that the Elastic Agent is running on host windows-server and is Healthy. We can navigate to Analytics > Discover to find our logs ingesting from our agents.

If we search our machine, we can find some logs with our machine name on them meaning that we are getting logs from our windows-server.