Kibana setup
Install kibana
Get the Kibana download link for deb x86_64
Let’s SSH into our elk-server and do the following:
wget [download link]dpkg -i [package name]Modify kibana.yml
After the installation is done, we’ll need to make some changes to the kibana configuration. The configuration file is located in /etc/kibana/kibana.yml.
cd /etc/kibana/nano kibana.yml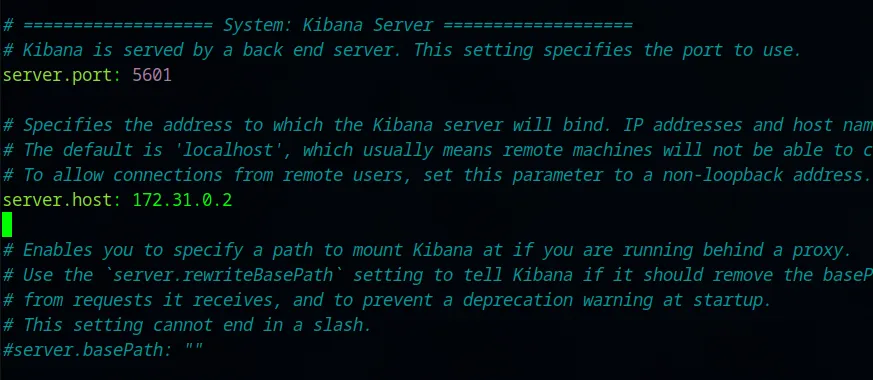
We want to change the server.port and server.host fields. Let’s uncomment the two fields and assign server.host to our elk-server IP and server.host to port 5601 which we’ll use later to access Elastic GUI from our machine. Let’s save the modified file.
Start kibana.service
We can now start the kibana service instance.
systemctl daemon-reloadsystemctl enable kibana.servicesystemctl start kibana.servicesystemctl status kibana.service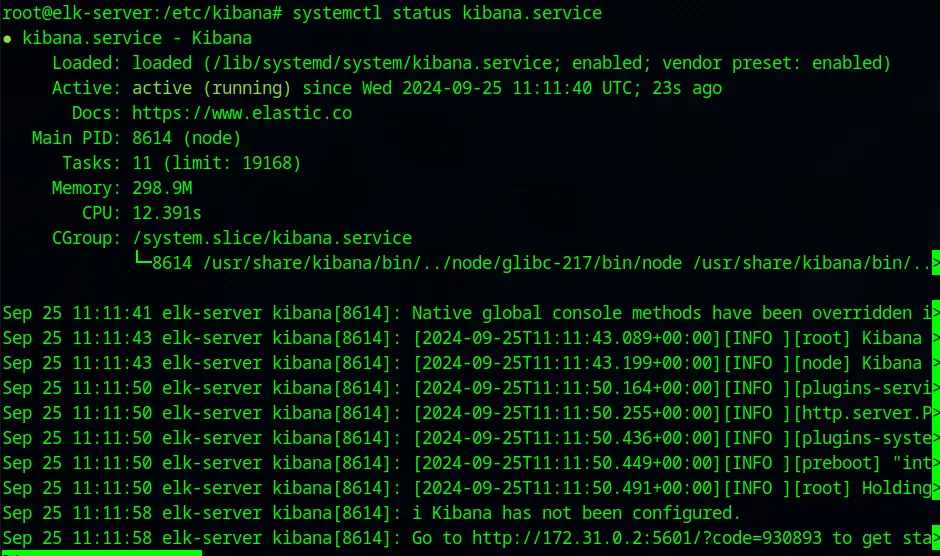
We see from the status that the service instance is active and running.
Create elasticsearch token
Before we access Kibana, there is one more thing we need to do. That is to generate an elasticsearch enrollment token for kibana. To do this, we go to /usr/share/elasticsearch/bin.
cd /usr/share/elasticsearch/bin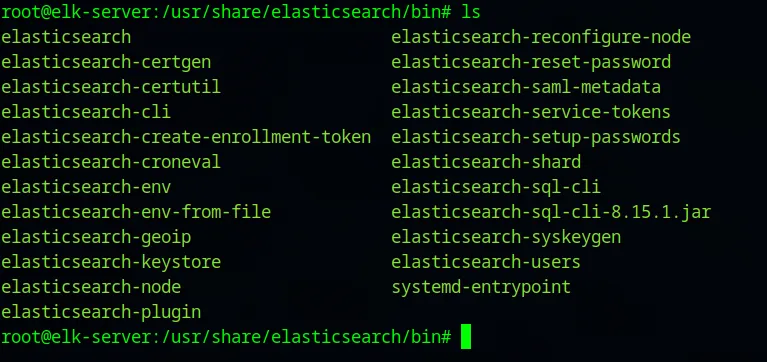
These are all of the binaries for elasticsearch. We need elasticsearch-create-enrollment-token. To create a token:
./elasticsearch-create-enrollment-token --scope kibanaI am saving the I token got. We’ll require this token soon to start up our Elastic GUI.
Access kibana
Since our firewall is already configured to allow our IP AKA SOC Analyst machine on all ports, now we can try and access the kibana instance that is running. We can go to the link:
http://<elk-server-external-IP>:5601
The elk-server-external-IP needs to be replaced with the reserved external IP GCP provides us with our running elk-server machine. We should now be able to access the Web-GUI from our browser:
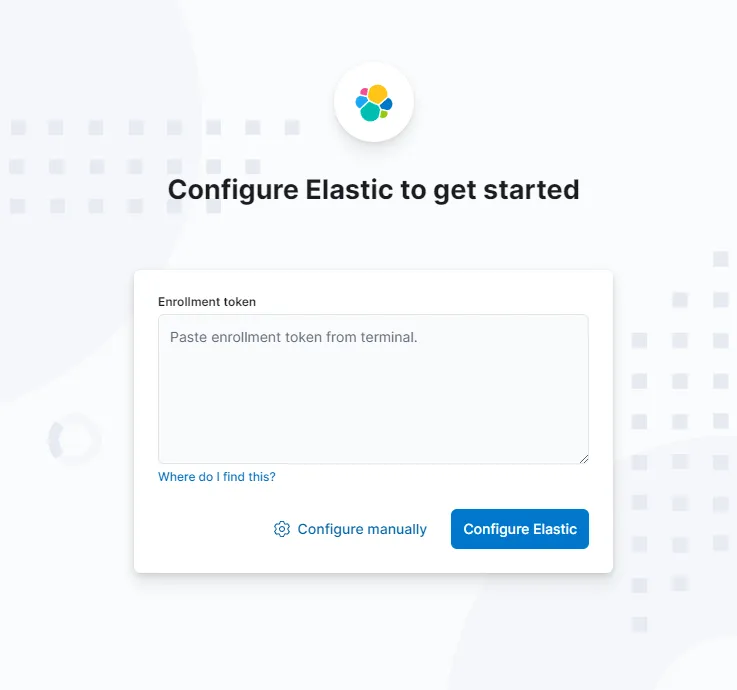
We can paste the enrollment token generated previously here. Click Configure Elastic button and then we’re presented with:
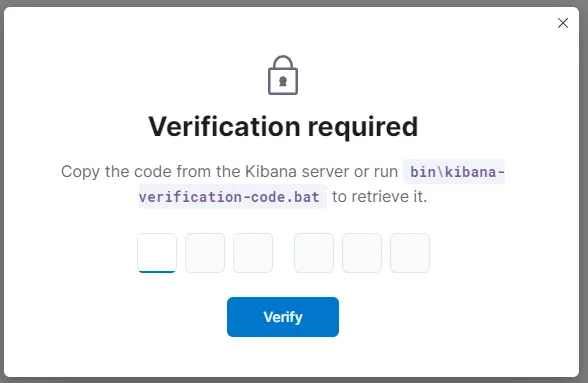
We go back to our Ubuntu VM and navigate to /usr/share/kibana/bin.
cd /usr/share/kibana/bin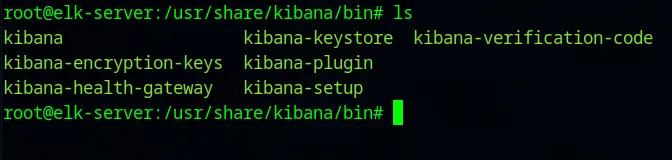
The kibana-verfication-code is the one we need to run.
./kibana-verification-codeAfter we put in our code, the elastic service starts.
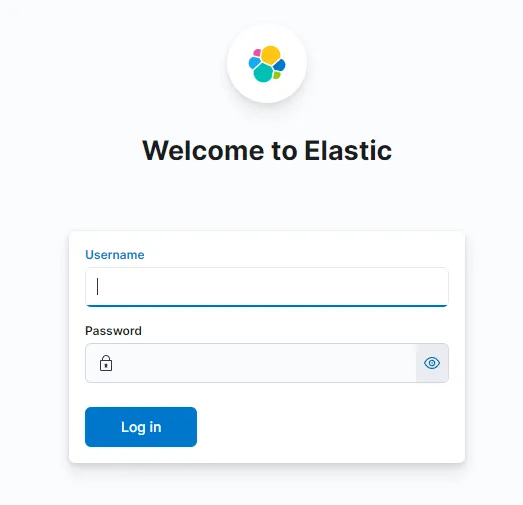
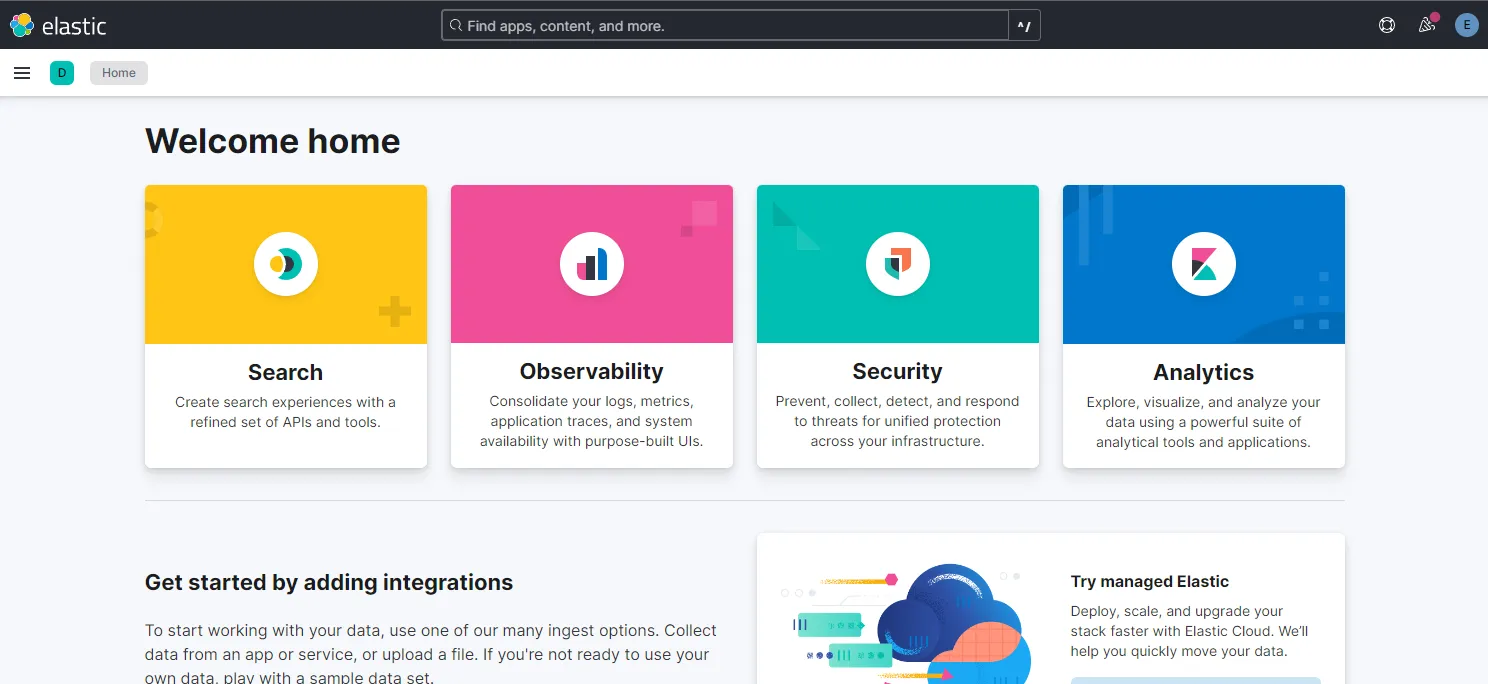
The username is elastic and the password is the one we got while installing elasticsearch. After logging in, we are presented with the elastic homepage.
Resolve API integration error
One last configuration is needed. Navigate to:
left-corner hamburger menu icon > Under security > Alerts
Here we get an alert: API integration key required. To resolve this, we invoke the kibana-encryption-keys from /usr/share/kibana/bin/.
cd /usr/share/kibana/bin./kibana-encryption-keys generateLet’s save the generated keys somewhere. We need to add these keys into a “keystore”. To do that:

Now we need to restart the kibana service instance running on the machine.
systemctl restart kibana.serviceIf we log in into the Web-GUI again, we can no longer see the API integration key required error under the Alerts Section.
We have SUCCESSFULLY finished installing and setup of Kibana