Elasticsearch setup
Elasticsearch Setup
To set up our elasticsearch service, we first need to deploy a VM instance with the Google Compute Engine.
Steps to create the ELK VM
- Go to Compute Engine > VM Instances > Create Instance.
- Name the instance (
elk-server)- Choose Region: Pick the same region our VPC resides in (I choose ‘asia-east1’ and zone
asia-east1-a).- Machine configuration: Select a machine type with 4 vCPUs and 16 GB RAM (e.g. e2-standard-4).
- OS and Storage: Choose Ubuntu 22.04 LTS as your operating system and sufficient storage (I choose 80 GB SSD persistent disk)
- Networking: I’m not adding any additional firewall rules from here. Network tag is
elk-serverto implement firewall ruleallow-agent-logs. Under network interface let’s choose our VPCsoc-elkand select subnetvpc-internal. Let’s choose a custom IP address (I choose172.31.0.2. We cannot use172.31.0.1for our machines as it is already reserved for the gateway). Let’s also Reserve an Static External IP and name itelk-server-external-ip.- Leaving all the other options as it is for now
- Click Create to create our ELK server instance
My ELK instance config
| Configuration | Value |
|---|---|
| Instance Name | elk-server |
| Region | asia-east1 |
| Zone | asia-east1-a |
| Machine Type | e2-standard-4 (4 vCPUs, 16 GB RAM) |
| Operating System | Ubuntu 22.04 LTS |
| Storage | 80 GB SSD persistent disk |
| Network | soc-elk |
| Subnet | vpc-internal, range 172.31.0.0/24 |
| Internal IP | 172.31.0.2 |
| Static External IP | elk-server-external-ip, reserved |
| Firewall Rules | As configured for the network. Use network tag elk-server to enable allow-agent-logs |
| Network Tags | elk-server |
Once the server instance is running, we can now SSH into the machine.
SSH into the VM
- Generate an SSH key on our local machine with:
ssh-keygen -t rsa -C [username]- Save them in the default location (simply press enter)
- Generate a passphrase
- Go to the Compute Engine > Metadata > SSH Keys section and add the
~/.ssh/id_rsa.pubpublic key- Go to the VM Instances > Choose our machine > Click edit > Under the SSH Keys section > add the public key again in here
- Now we should be able to SSH in to the VM from our local machine by:
ssh -i id_rsa [username]@[machine public ip]
Now that we are in the machine we need to do a few things. First we’ll get root access and update our repositories.
sudo -iapt-get update && apt-get upgrade -yInstall elasticsearch
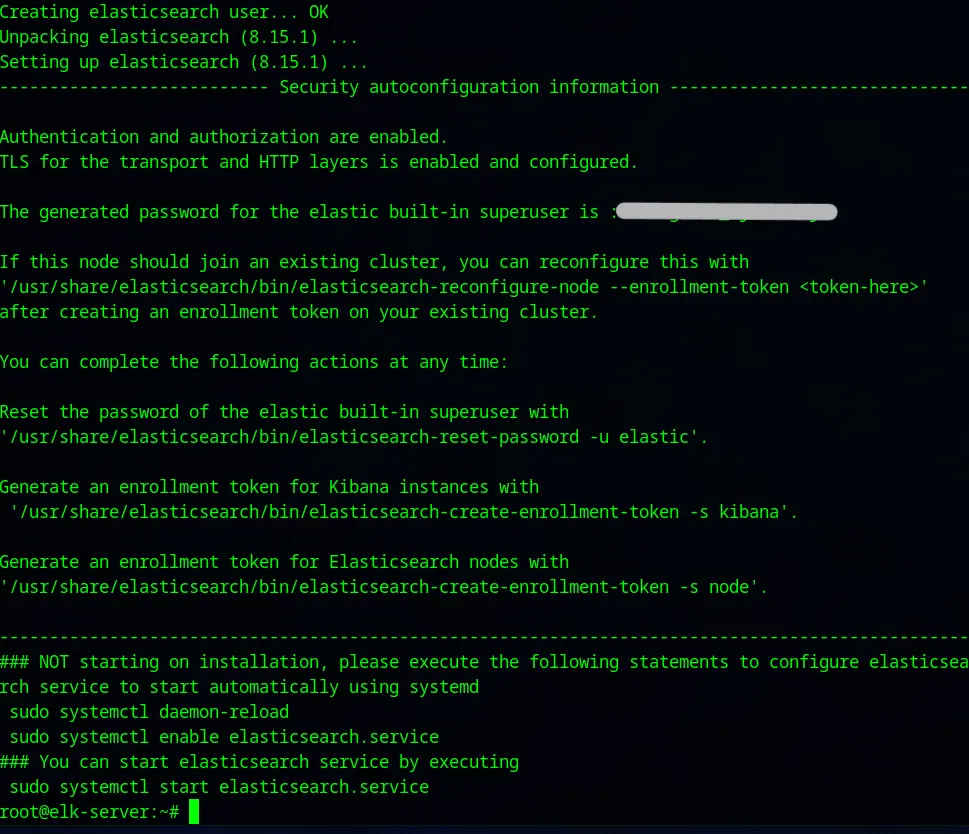
Get the download link for Elasticsearch. Choose deb x86_64
wget [download link]dpkg -i [package name]Save the info displayed after package installation is completed. Specially the password.
Modify elasticsearch.yml
Now we go to the: cd /etc/elasticsearch where all the elasticsearch files are stored. The configuration settings for our elasticsearch instance will be saved on the elasticsearch.yml file. Before opening that, we need to know our IP address.
ip a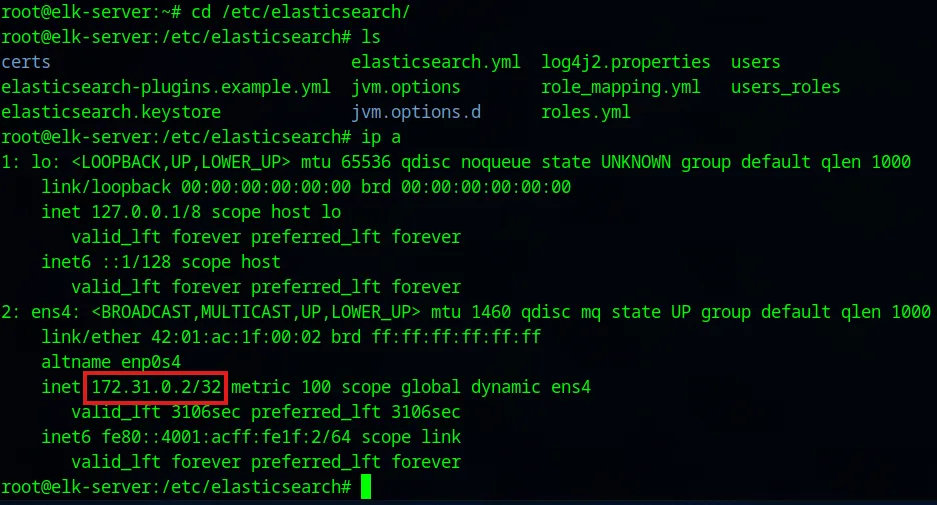
The network host will allow SOC Analyst machine to access our VPC according to our firewall rules. The elasticsearch service running on this elk-server will be exposed on the VPC network via this static internal IP address on port 9200 (default port elasticsearch listens on).
nano elasticsearch.yml
Under the Network section, I have removed the comments and modified the values for network.host and http.port to our desired values and saved the file.
We are now ready to start up our elasticsearch service.
Start elasticsearch.service
root@elk-server:/etc/elasticsearch# systemctl daemon-reloadroot@elk-server:/etc/elasticsearch# systemctl enable elasticsearch.serviceCreated symlink /etc/systemd/system/multi-user.target.wants/elasticsearch.service → /lib/systemd/system/elasticsearch.service.root@elk-server:/etc/elasticsearch# systemctl start elasticsearch.serviceTo make sure that our service has started:
root@elk-server:/etc/elasticsearch# systemctl status elasticsearch.service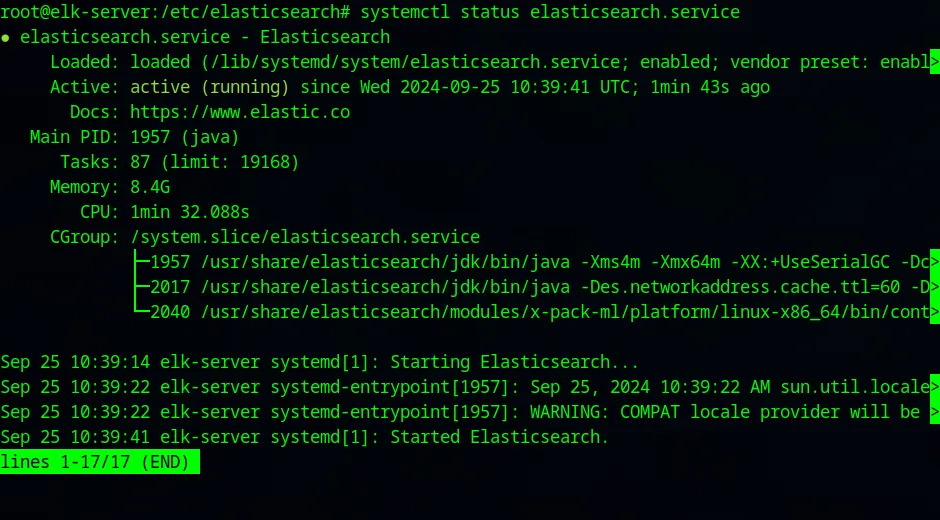
We have now SUCCESSFULLY installed Elasticsearch