osTicket Setup
Objective:
- Setup and configure osTicket
Steps to create osTicket server
- Go to Compute Engine > VM Instances > Create Instance.
- Name the instance (
osticket-server)- Choose Region: Pick the same region our VPC resides in (I choose ‘asia-east1’ and zone
asia-east1-a).- Machine configuration: Select a machine type which won’t incur much cost (e.g., e2-medium with 2 vCPU and 4GB RAM).
- OS and Storage: Choose Windows Server 2022 Datacenter as operating system with enough disk space (I chose a 60 GB SSD disk)
- Networking: Setting hostname
osticket.server. I’m not adding any firewall rules from here. Under network interface let’s choose our VPCsoc-elkand select subnetvpc-internal. Let’s choose a custom IP address (I choose172.31.0.4. We cannot use172.31.0.1for our machines as it is already reserved for the gateway and172.31.0.2for ourelk-server, and172.31.0.3for ourfleet-server). I’ll leave the external IP address as Ephemeral.- Leaving all the other options as is
- Click Create to create our osticket server instance
My osticket instance config
| Configuration | Value |
|---|---|
| Instance Name | osticket-server |
| Region | asia-east1 |
| Zone | asia-east1-a |
| Machine Type | e2-medium (2 vCPUs, 4 GB RAM) |
| Operating System | Windows Server 2022 Datacenter |
| Storage | 60 GB SSD |
| Hostname | osticket.server |
| Network | soc-elk |
| Subnet | vpc-internal, range 172.31.0.0/24 |
| Internal IP | 172.31.0.4 |
| External IP | Static, osticket-server-external |
| Firewall Rules | As configured for the network |
| Network Tags | None |
Setup web server
Let’s RDP into the machine first. I’ll be using Apache’s XAMPP to launch the web server. I am installing the latest version of XAMPP on the machine with the default configurations. I have also configured XAMPP to run on startup with configuring the Apache and MySQL service to run as system services.
After the installation is done, I am heading over to the C:\xampp directory. To be able to modify the files, I am going to change permissions to the directory to allow my account full access over this folder.
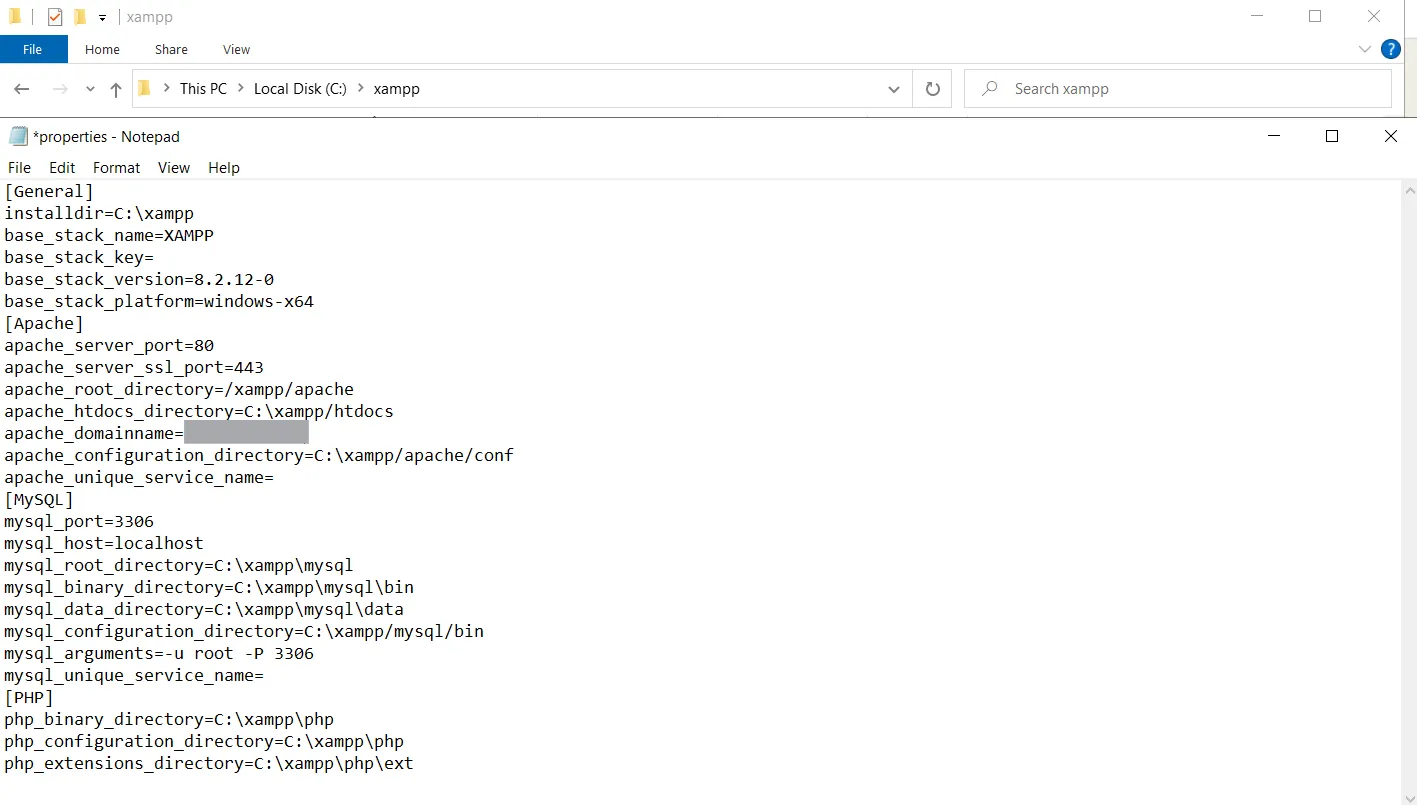
I am changing the apache_domainname value to my <osticket-server-external> IP address.
To be able to access the web server, I’ll need to make sure that my machine firewall is allowing inbound traffic on port 80 and port 443. I am going to open Windows Defender Firewall with Advanced Security.
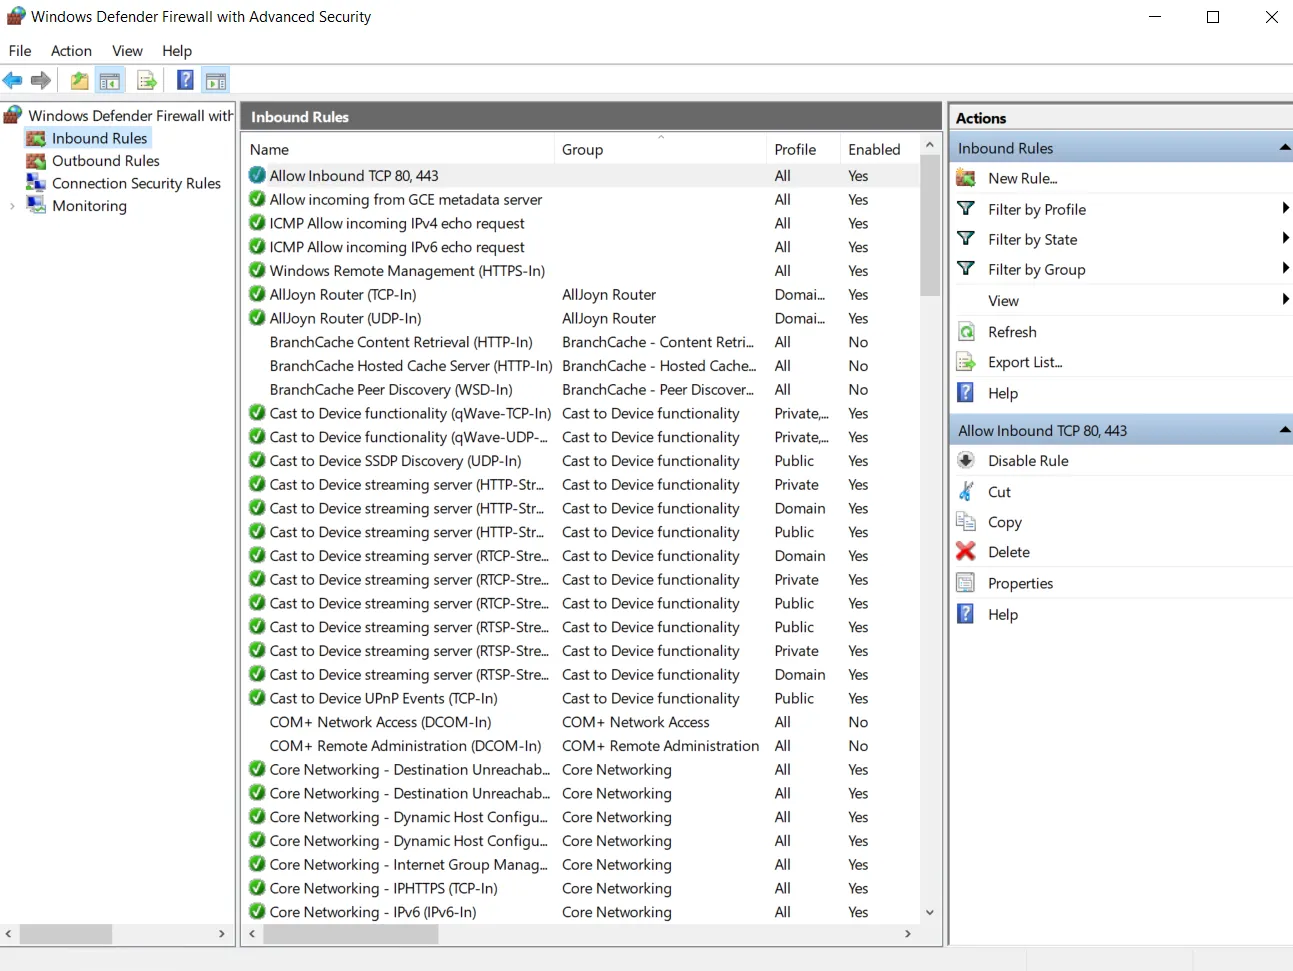
I have created a new inbound rule to allow TCP port 80 and 443 traffic.
From the XAMPP Control Panel, let’s start Apache and MySQL service. Now I’ll launch Apache Admin and click on the phpMyAdmin button from the title bar above.
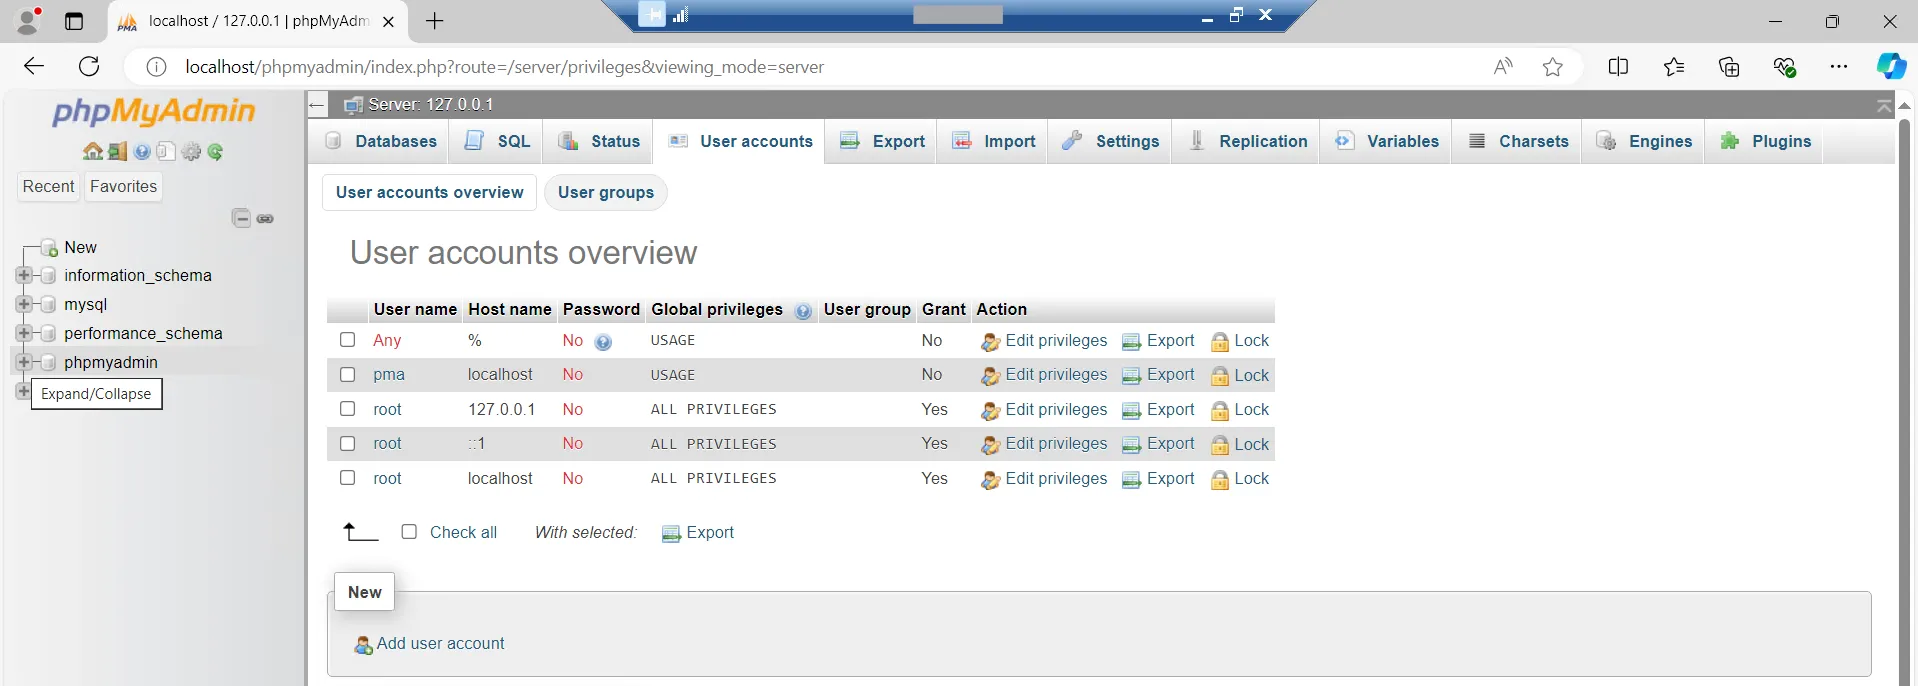
User accounts > Click on
rootusername withlocalhostset as hostname > Login information
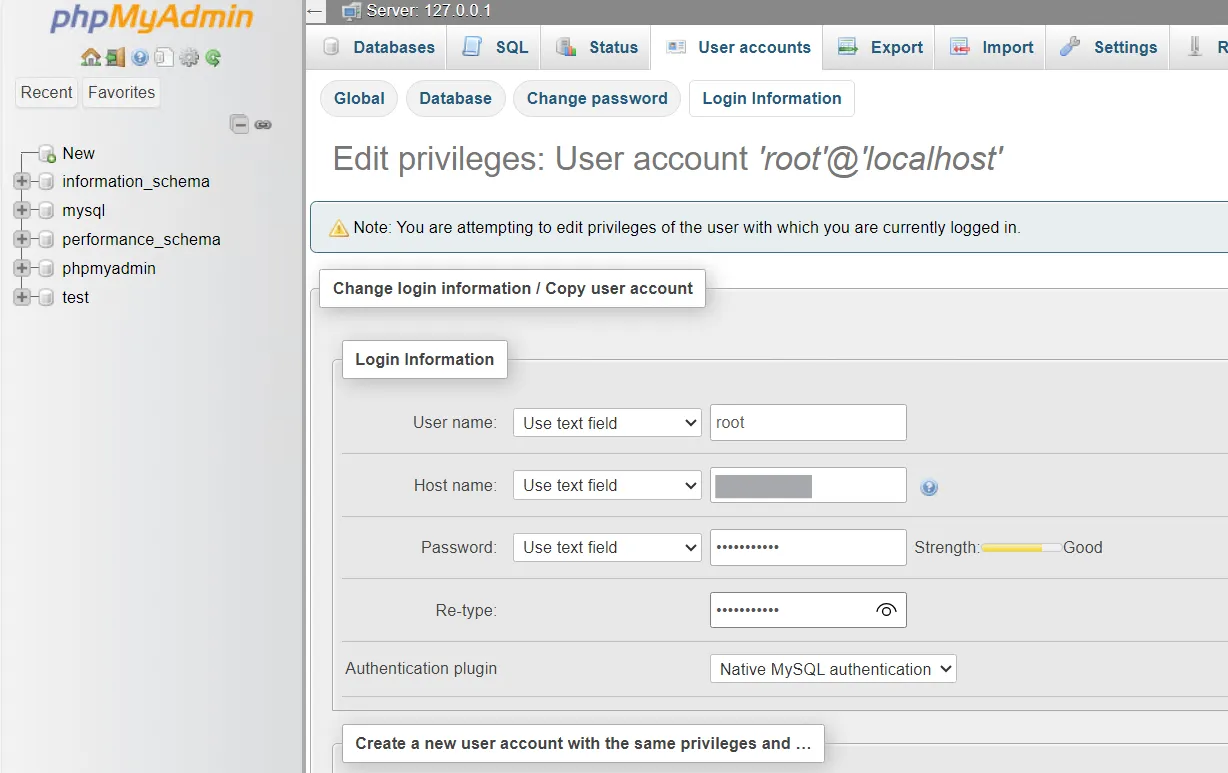
I am changing the hostname field to my machine’s internal IP address. I am also setting a password for the root account. Also setting the same configuration for pma account.
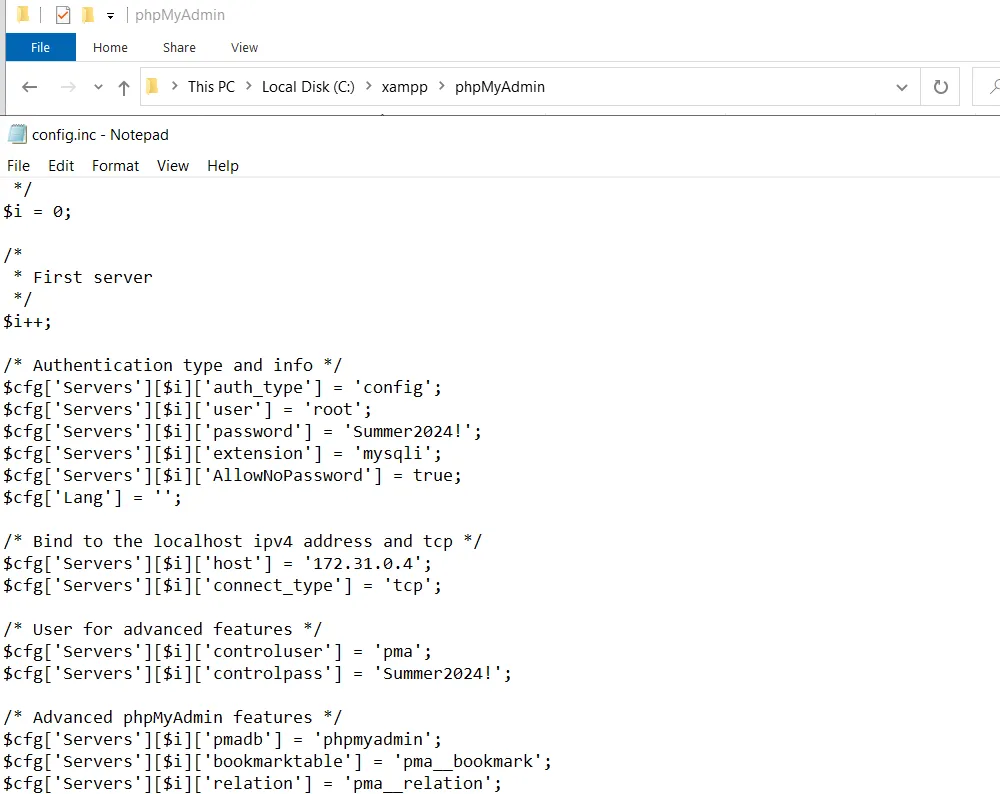
I am also going to open the c:\xampp\phpMyAdmin\config.inc.php file and change the value of the binding IP address to our machine internal IP to be able access the web server. I will also set the password values for root and pma users as configured. Firewall rules are already in place as our machine is on the soc-elk network.
Let’s access our phpMyAdmin again with the modified config. I will also add a separate osticket database. For this I am creating a new database called soc_db. I will also grant my root@172.31.0.4 user all privileges on the database(should already be in effect with privilege level set to ALL PRIVILEGES).
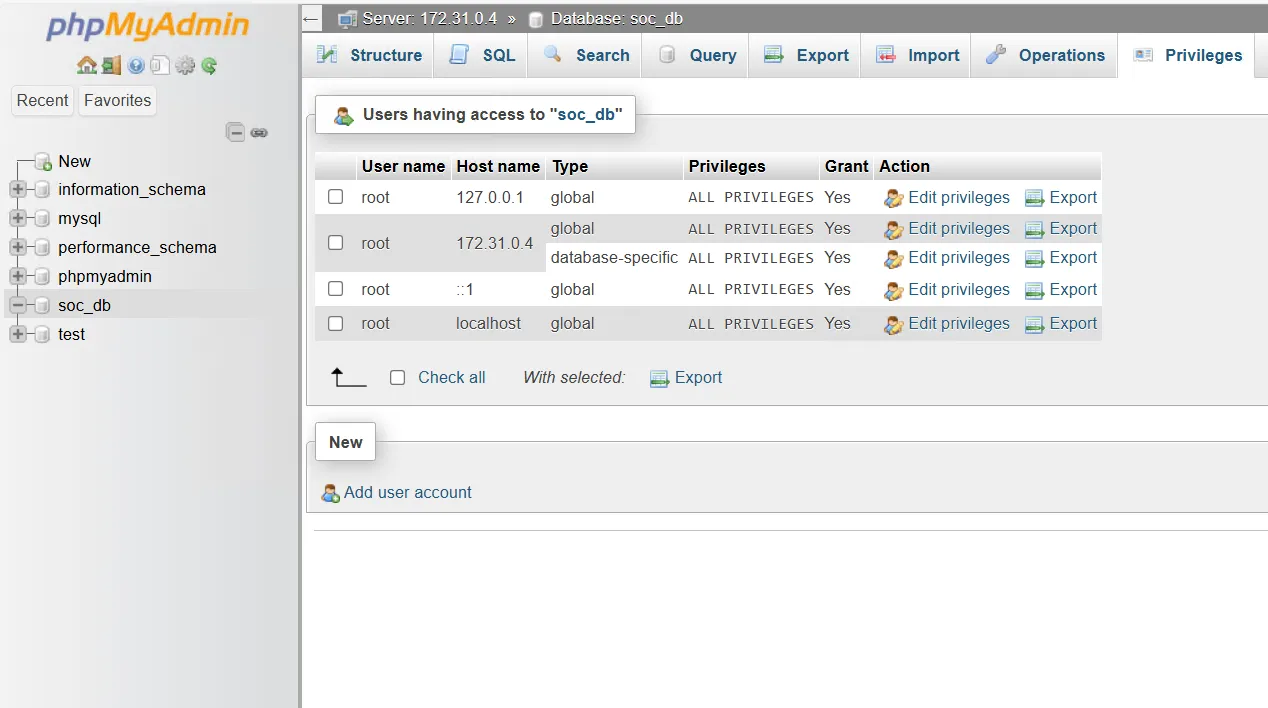
Now when we check the privilege page of our soc_db database, we see that our database has been set up and configured properly.
Install osTicket
From the osTicket Download Page I am downloading osTicket without any Plugins. After the download has finished, extracting the zip file.
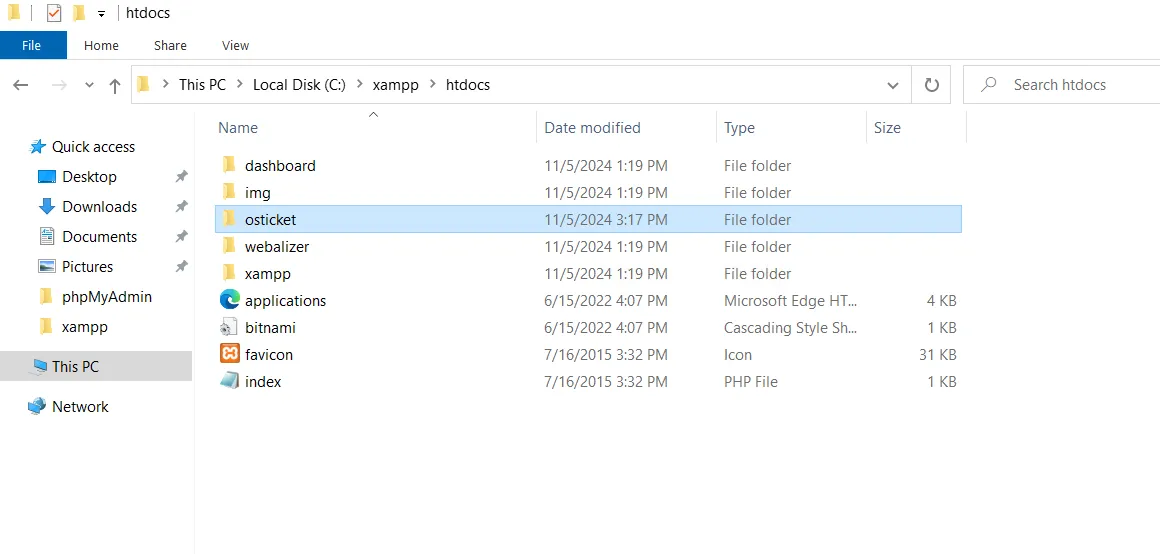
Let’s create a new directory osticket under c:\xampp\htdocs and copy the extracted contents here.
Now from any browser, if we go to http://<osticket-server-external-ip>/osticket/upload/ we are presented with the following page.
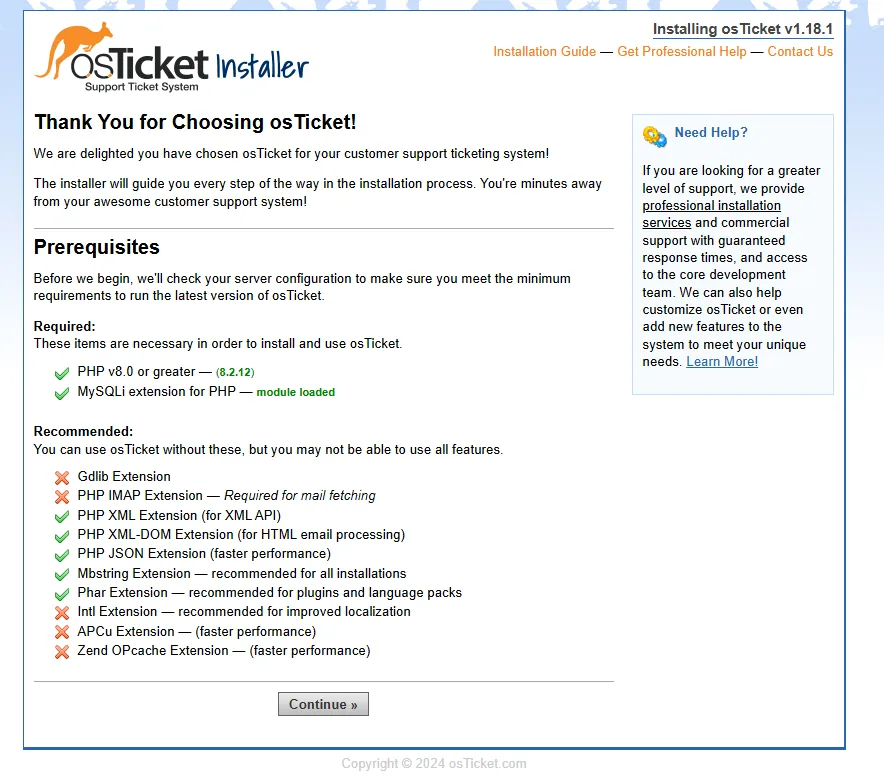
Before we continue, I’ll need to change the include/ost-sampleconfig.php file inside the C:\xampp\htdocs\osticket\upload\include directory to ost-config.php. Let’s hit continue now on the setup page.
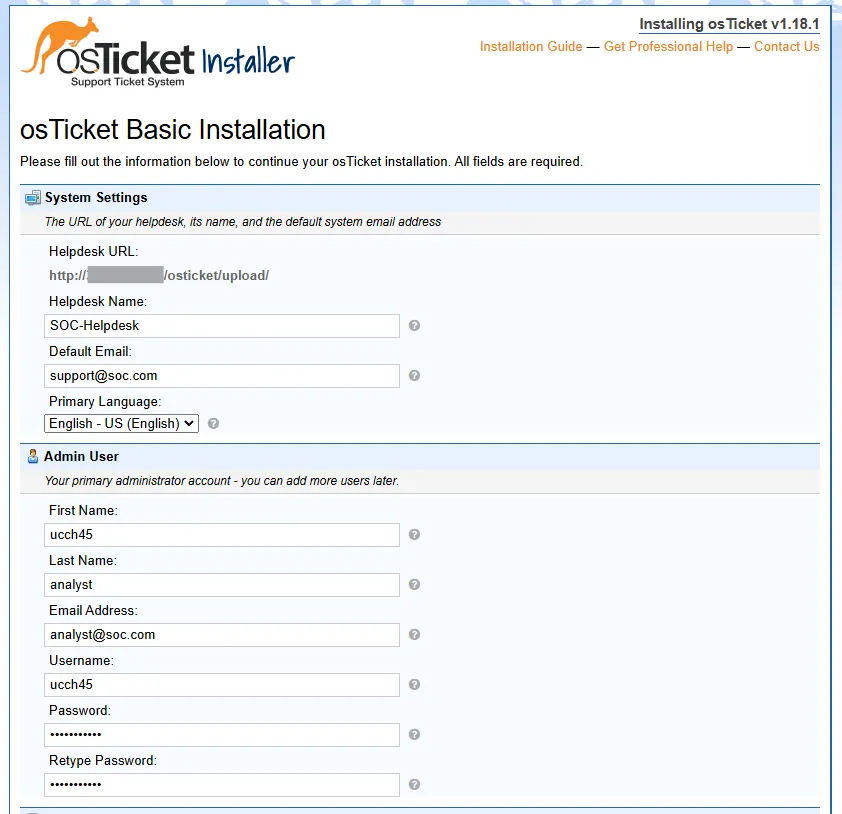
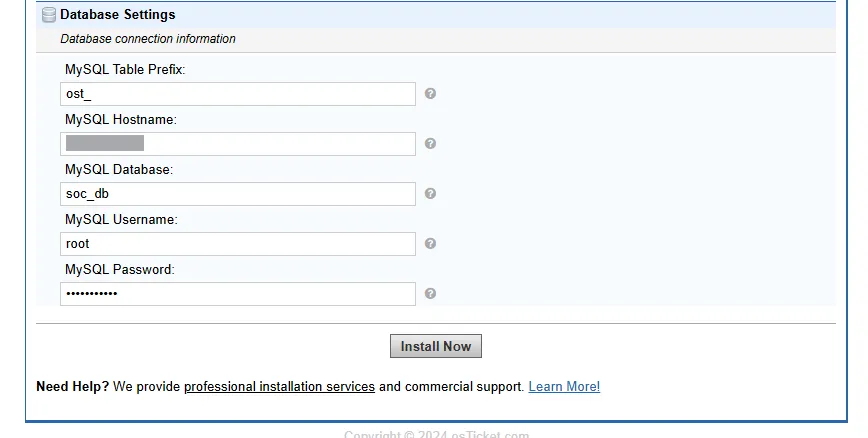
I am filling up the installation form with some basic information. For the database settings, I’ll add in our <osticket-server-internal-ip> and the root username and password for our database and then hit install now.
My osTicket is now successfully installed.
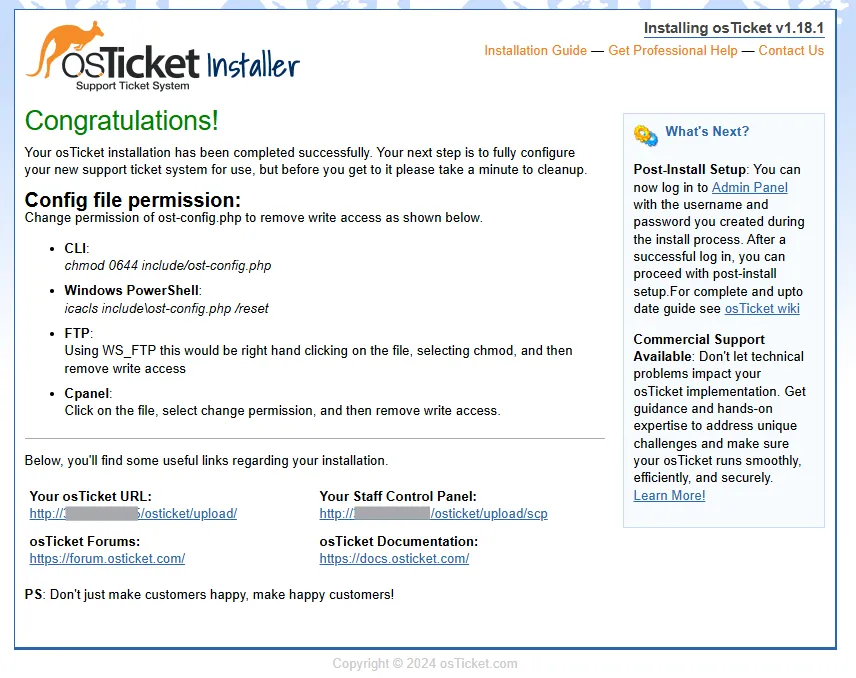
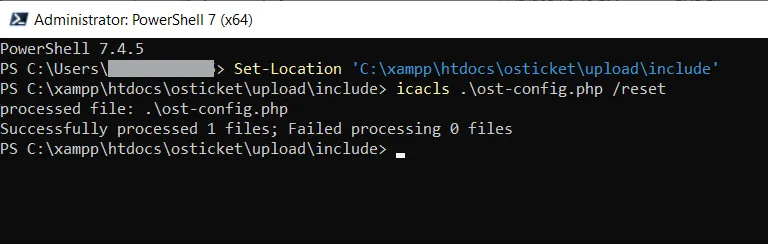
As instructed, I will be removing write access from the ost-config.php file using PowerShell as administrator.
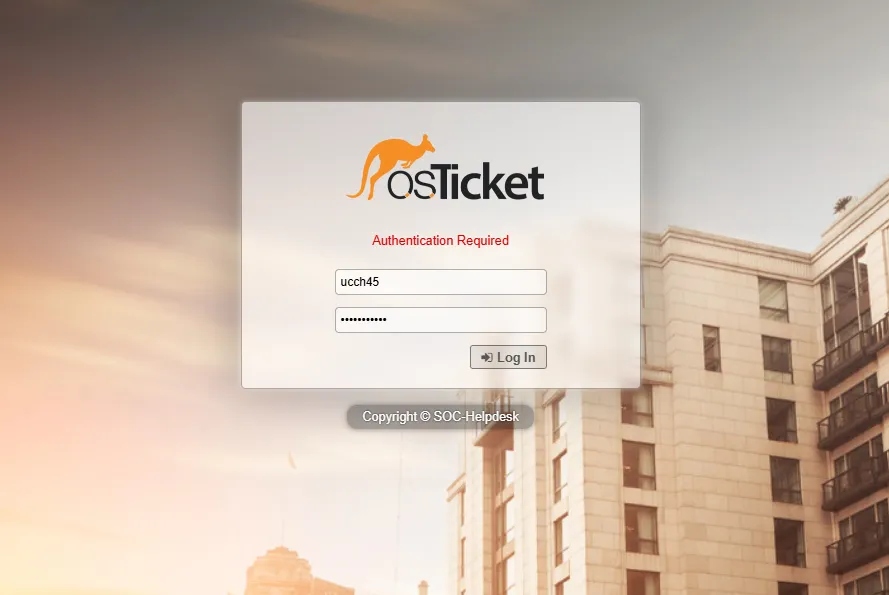
Access osTicket
Let’s go to the staff control panel link (which is http:<osticket-external-ip>/osticket/upload/scp) and login using our admin credentials.
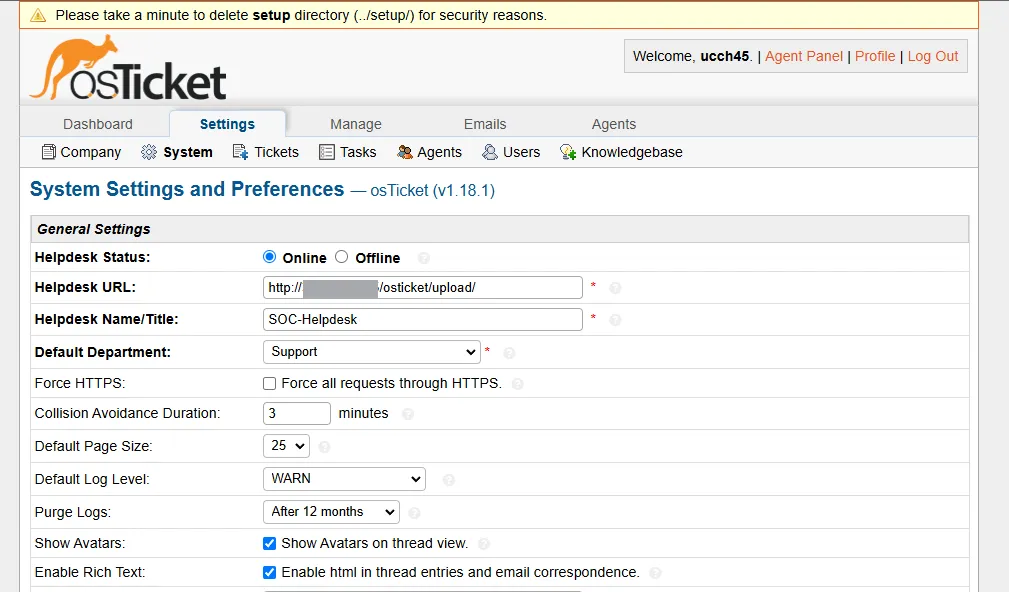
After logging in, we are presented with the admin panel. We can set up everything needed for our ticketing service from here.
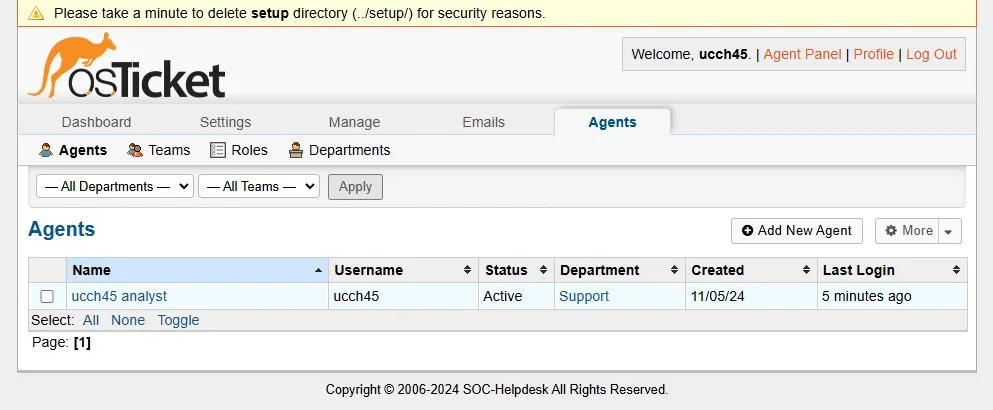
Under the Agents tab, we can see our Agent account created. We can add new agents as necessary.
Let’s go the the Agent Panel.
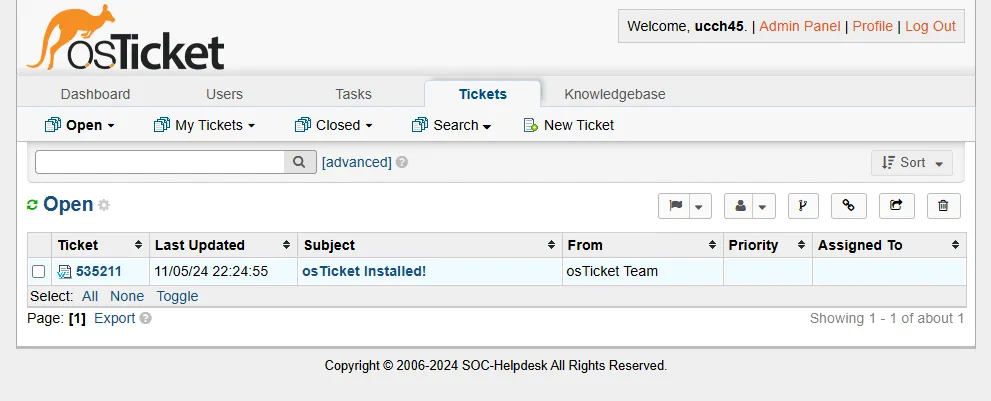
Here we can see that the first ticket has been created for osTicket successfully installed.